
I love Sock Monkey's! They are fun and easy to make. Here is a step by step tutorial following my making of a sock monkey.
Supplies needed:

- First, you will need a pair of socks. They need to be mid calf length, (or longer). I have found that the heavier winter socks work best for the sock monkey. (There are websites were you can order the "original" sock monkey sock- they are pricey though- so I stuck with socks purchased from Marshall's).
- Turn both socks in-side-out.
- flatten one sock out, with heel down.
- draw a line, i use sewing chalk, down the center of the sock - drawing away from the heel all of the way to the toe. Start the line about 1" away from the heel.

- Sew down both sides of the line and connect the stitching at the top of the line (making a "U" shape). I use the presser foot as a measure for the perfect seam.
- This is what it will look like after you have sewn both sides of the line.

- Cut down the center on the line.

- Flip the sock right-side-out. Stuff the legs and body.

- Find the area where you would like your neck to be.
- With the heavy thread, stitch around the neck area 1/4" spacing all of the way around the body.
- When finished, pull both ends of the thread tightly and then knot the ends together making a neck.


- Now finish the top of the head.
- There are several ways to close it up. In the pictures I have chosen to leave a "crest or "crown" on my monkey.
- Gather the top of the sock up using the same 1/4" stitching as before.


- After cinching the head, stitch closed the left over sock top. (If making a rounded head, just stuff the head all of the way, cutting off any extra sock, and stitch the sock top flat and round.)

- Take the other sock and flatten it, folded in half.
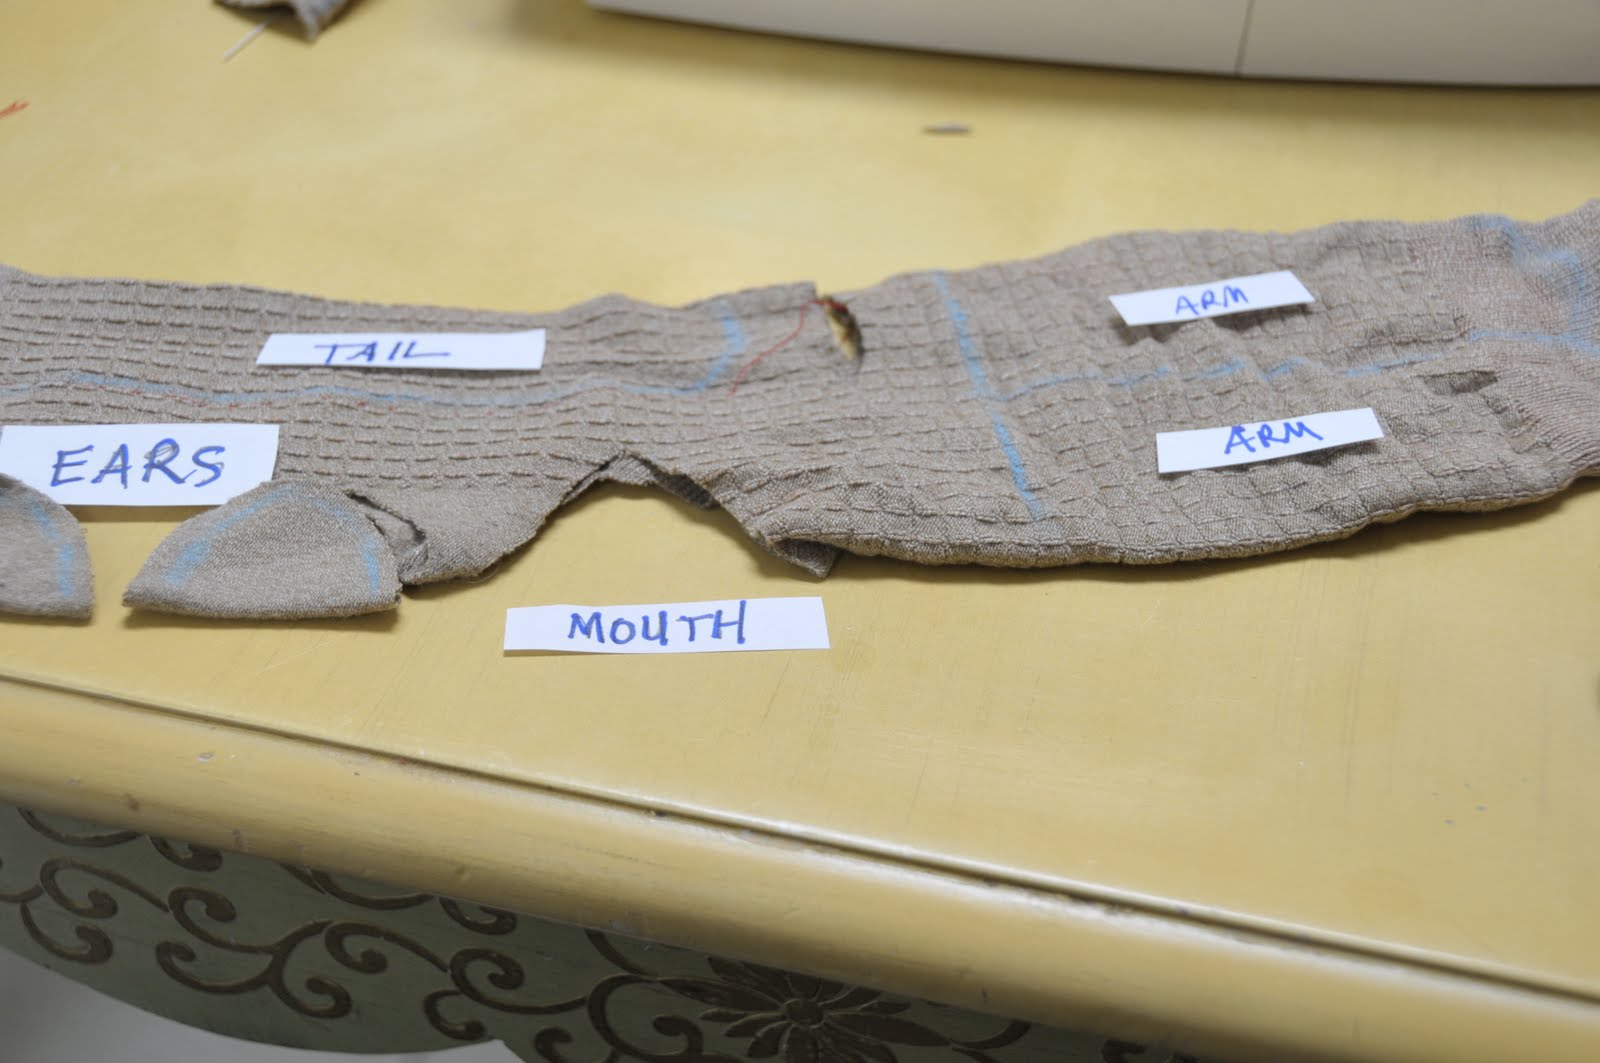
- With the sewing chalk, draw your arms, ears, mouth, and tail on the sock. (on the picture below I mislabeled the arms as "legs"- but, they are ARMS!)

- Cut the ears and mouth out of the sock, set them aside.
- Using the same guidelines as with the legs, sew around the line for the tail and arms.
- Cut them out.
- Flip them right side out and stuff them.


- Ears: Fold the ear pieces in 1/2 with wrong sides touching.
- Begin to sew them shut, leaving a small area open to stuff.
- Once stuffed, sew shut and attach to the head of the monkey.


- Begin to attach the mouth. I start by aligning the mouth piece on the face and sewing the top first and leaving a space big enough to stuff the mouth.
- Once stuffed, sew the mouth completely on.


- Now attach the stuffed arms and tail.
- Add eyes by sewing them or putting on buttons.
- You are finished!


Great job on the sock monkeys, Ann! Love the step-by-step tutorial and all the pictures!
ReplyDelete